October 3, 2011
Apple Fritters
I've always enjoyed apple season. We used to go and pick apples at Stephenson's Orchard as a family when I was young. My sister and I would climb the trees to get some of the best apples from the tops. I have fond memories of blue rimmed heart shaped sunglasses during these adventures. Yeah 80's. I don't think you were supposed to climb the trees but we were little and probably light enough it didn't matter. We picked a ton of apples, mostly Jonathan apples, and stored them in a fridge in the garage. I miss the convenience of having an extra fridge or freezer. I don't know if the orchard still exists for picking in the Kansas City area, but the restaurant that had some of the best apple desserts does not. I was always fascinated by their caramel apples, and still am to this day. I'll be making my own soon so don't fret. I also have a special place in my heart for fried dough balls filled with apple chunks.
I picked a variety of recipes for the month of September for the Easy Bake cOven blog but I chose to make the fritters first. I usually get around to making quite a few of the recipes but these were calling me. Michael asked why I bought so many apples at Trader Joe's when we got back from our NYC trip, my response was baking. It's usually baking when I buy an excess of one particular ingredient. Unless butter is on sale...
I don't fry things often. Sometimes Michael and I will make tortilla chips if we're out and have nothing but corn tortillas, but this is the extent. Desserts are excessive to start and I feel worse eating something fried. Doughnuts fall in this category. I love doughnuts but don't have them often. Guilty pleasures. I really enjoyed these little fried dough balls. Simple and quick yet small enough you don't feel bad eating a few.
Apple Fritters
Pioneer Woman
I halved the recipe and it made about 2 dozen ping pong ball sized fritters.
2 C all purpose flour
1/2 C sugar
3 T sugar
2 1/4 tsp baking powder
1 1/4 tsp salt
2 tsp ground cinnamon
2 large eggs
3/4 C milk
2 tsp vanilla
2 T melted butter
2 whole granny smith apples peeled and diced
powdered sugar for dusting
In a medium bowl, combine flour, sugar, baking powder, cinnamon, and salt.
Melt the butter in a large liquid measuring cup and add the milk, egg and vanilla. Whisk to combine. Add the wet ingredients to the dry and stir until little flour remains. Add in the apples and stir to combine.
Heat a couple of inches of canola oil over medium heat. I kept my oil temperature around 325˚F and the fritters took about three minutes each. Using a small cookie scoop, drop a few blobs of dough into the hot oil, don't overcrowd or your oil will not stay consistently hot. Flip them over to insure even golden brown and test your first batch to make sure they are evenly cooked. Drain on a paper towel and sprinkle with powdered sugar for eating.
September 22, 2011
Almond Spiced Granola
You know how much I like granola right? I like chewy granola and crunchy granola, and I like trying new recipes. I recently adapted a recipe from Whole Foods and though I may have cooked it two minutes longer than I should (I blame allergies for lack of smell) I've enjoyed it. It's versatile because it is sweet and crunchy and no flavor is too overpowering.
If you are like me and feel ravenous before dinner, you can eat it by the handfull while rummaging through your kitchen for something to cook. You could also sprinkle it on muffins before baking, make a delicious yogurt parfait with seasonal fruits and agave nectar (or honey), use it as a topping for ice cream, make trail mix, or scoop it from a bowl filled to the brim with milk.
I like to eat yogurt wearing a toga, but you can wear whatever you like. Any way you eat it, I'm sure you will like it. Feel free to make it something you really love.
Almond Spiced Granola
adapted from Whole Foods
3 C old fashioned oats
3 T whole wheat flour
1 C slivered almonds
1 C pecan pieces
1/4 tsp kosher salt
2 tsp ground nutmeg
1/2 tsp pumpkin pie spice (or equal amounts of cinnamon, nutmeg and ginger)
1 tsp almond extract (or substitute vanilla)
1/2 C honey
1/3 C canola oil
Preheat the oven to 275˚F and line a large rimmed baking sheet with a silpat. Mix the dry ingredients and nuts in a large bowl. In a measuring cup add oil, honey and vanilla and stir. Add the honey mix into the oats and stir to coat evenly.
Bake for 30-40 minutes stirring occasionally to break up the larger pieces. Remove from oven when it's light brown and fragrant. Cool on the baking sheet for 1 hour or until completely cool (it will crisp up if it seems too wet after baking). Store in an airtight container.
July 8, 2011
Apricot Blueberry Cobbler
Kitchen disaster behind, I decided to use some new ramekins to make individual apricot blueberry cobblers. Sugar Dough was the monthly recipe for June over at the Easy Bake cOven and since I had some very ripe fruits in my fridge, I put together this incredibly simple dessert.
I think most people are more familiar with cobbler that has a fruit filling and a sugar dough topping. Sugar dough may range from a biscuity dough to a thick crumble, and even hunks of bread. The sugar dough recipe we used came from the restaurant stove in Portsmouth, Virginia. I was reading a blog post the other day and someone said they were skeptical of restaurants who published their recipes. Would they leave something out? Why would they reveal their secrets to ordinary people? Well, I can't tell you the answers to these questions, but I'm glad that some restaurants are confident enough to do it. I have a feeling knowing Stove's recipe will not keep Sarah & Eric from going back! Thanks for picking this recipe, it was fantastic!
you can use any stone fruit or fruits that won't obliterate when cooked
for one 10 oz ramekin:
slice 3 small fruits into a buttered ramekin
add 2 tablespoons blueberries
break up 1 scant tablespoon of butter and distribute evenly
sprinkle 1 tablespoon of sugar over the top
top with sugar dough and press lightly into the fruit (about 1/2 to 3/4 cup)
set ramekins on a baking sheet
bake for 20-25 minutes at 350˚F or until the fruit is bubbly
May 31, 2011
Low-Fat Blueberry Coffee Cake
from Whole Foods Recipes
2 C fresh or frozen and thawed blueberries divided
1 C whole wheat flour
1/2 C unbleached all purpose flour
1/4 C sugar
2 tsp baking powder
1/2 tsp baking soda
1/4 tsp salt
1 C plain non-fat yogurt
1 tsp vanilla
2 eggs
1/3 C sliced almonds
for the topping:
2 T whole wheat flour
1/4 C brown sugar
2 T butter
1/2 tsp cinnamon
1/4 tsp cardamom
Preheat the oven to 350˚F. Spray a 9 inch springform pan with cooking spray and set aside. Mix together the ingredients for the topping in a small bowl with your fingers until it you have pea sized clumps.
Whisk together the remaining dry ingredients. Combine yogurt, eggs, and vanilla in another small bowl and add to the dry ingredients. Mix until just combined. Add half the blueberries and smooth into the prepared pan. Sprinkle the topping evenly over the batter and add the remaining blueberries. Top with the almonds. Bake for 30-35 minutes or until a toothpick comes out clean. Cool 10 minutes and remove the sides of the pan. Let cool another 20 minutes before serving. Store covered in the fridge for up to 5 days.
You can also use a standard 12 tin muffin cup with liners instead of the springform pan. Reduce the baking time to 22-25 minutes.
May 1, 2011
There's No Cake In Cheesecake
So, instead of cake, I made her a cheesecake. It happened to work out well since cheesecake was one of the monthly recipes for the Easy Bake cOven for April. I made a lemon base cheesecake, and instead of topping it with the lemon glaze, I used fresh strawberries and kiwi.
It's been a long time since I made cheesecake! I also had never made a cheesecake without the water-bath technique. I decided to go ahead and try it without since the recipe said to... and the top cracked. Thankfully, I could cover it up with pretty fruit. No one seemed to care, and the cheesecake turned out well. I'd make this again, and it would be fun to try with the lemon glaze. I hope you enjoyed your birthday un-cake Rebecca!
April 30, 2010
Easy Bake cOven - Traditional French Desserts
The first, a Clafoutis, which is kind of similar to a dense sponge cake with a layer of berries on the bottom. I made it for a group of friends we were having dinner with this week. I had not planned on making both of the desserts but I had everything on hand to make this the night before our dinner.
The Clafoutis is very simple to throw together. Thanks to the food processor (or blender) all you really have to do is some measuring and press a button. I'm pretty sure this dessert might be great for all of those people who say repeatedly, "I can't bake..." so if this sounds like you, give it a try. Your friends will enjoy it. We enjoyed it topped with a scoop of vanilla bean ice cream. yum.
I'm not sure how, but this week ended up being incredibly busy. Except for Monday and Friday, we had something planned. I wanted to make the Fruit Tart for Rebecca's birthday (since she hates cake remember) and I had a time crisis. I sat on the couch Monday night feeling like I might not have time for the tart after our dinner Tuesday night. Something about baking for purpose - for someone - must send me into overdrive because I was able to make a bunch of little Tartlettes for her happy hour celebration. Yes, it would have been much easier for me to make one large tart, but bringing a tart to a bar and slicing it up... and serving it on flimsy paper plates did not sound appealing. Two bite morsels were more appropriate for the situation.
They turned out incredibly cute (the tiny tarts with two blueberries and one strawberry looked a lot like duck faces) and increased my biceps. So much whisking... my arm... and wrist... almost fell off. It may have been better if they had. All wimpy-ness aside, the pastry cream turned out like it should. Much better than my first attempt at lemon pastry cream about a year ago that killed my food processor. These tartlettes are perfect for a party, and if you have the time you can make everything in advance and assemble just before serving.
Thanks for choosing a few great recipes Rebecca. Looking forward to next months recipes. Check out the cOven monthly post for the recipes and other posts this month.
April 2, 2010
Strawberry Filled Cupcakes
For the Cupcakes
Line two tins with 18 muffin cups. Preheat the oven to 350˚F. Sift the dry ingredients excluding the sugar. Whisk together the buttermilk and eggs.
In the bowl of a mixer, rub the zest into the sugar until it is fragrant. Attach the paddle and fix the bowl to your stand mixer. Cream the sugar with the butter until light and fluffy. Add vanilla. Scrape the sides of the bowl and mix again for another minute. Add half of the milk/egg. Mix 1/3 of the flour mixture. As soon as it is almost incorporated, mix in half the milk/egg mix, and repeat ending with the flour. Mix for another minute or two to make sure everything is fully incorporated. Fill the muffin cups 2/3 full, you should yield at least 18. Bake for 20 minutes or until a cake tester comes out clean.
For the filling
For the buttercream
Whisk sugar and egg whites in a stainless steel bowl and set over a saucepan with simmering water. Make sure the bowl doesn't touch the water. Whisk until the mix feels hot to the touch. It will be very shiny. Add it to the stand mixer with the whisk attachment. Whisk on medium speed for about 5 minutes until the bowl comes to room temperature. Switch back to the paddle attachment. Cut the butter in half. Add one piece at a time. Wait to add more until the previous butter is mostly incorporated. Once all the butter is in, increase the speed to medium-high and beat for about 10 minutes. The buttercream will probably start to curdle but do not fret, it will become smooth again. After it is smooth, add the juice and vanilla a little bit at a time and voila, a perfect buttercream. Place a piece of plastic wrap on the surface and chill in the fridge a few minutes but not too long! Pipe onto the cupcakes (be sure to cover the cut portion).
March 29, 2010
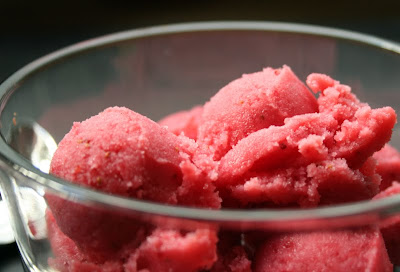
Strawberry Frozen Yogurt

March 27, 2010
Daring Bakers - Grapefruit Tian with Vanilla Bean Grapefruit Marmalade
The 2010 March Daring Baker’s challenge was hosted by Jennifer of Chocolate Shavings. She chose Orange Tian as the challenge for this month, a dessert based on a recipe from Alain Ducasse’s Cooking School in Paris.

There are a lot of steps to this dessert - even though the final product is fairly simple. A Tian is a layered dish, it can be savory or sweet, but most commonly it is made with vegetables. I chose grapefruit instead of orange because I like it more. I wanted to experiment with the marmalade, so I did some research and decided Vanilla Bean would pair well. I like the way it turned out - a little bitter - a little vanilla-y but mostly good.
The Tian is built with a layer of Pate Sablee (similar to a sweet pastry dough), a layer of marmalade, a thick layer of whipped cream with a little marmalade mixed in, and a layer of fresh fruit. The fruit was supposed to be covered in a caramel made with fruit juice, but I decided to use it only on the top. I may not make this again assembled as a dessert, but combining the marmalade with multiple ingredients is a great idea that I will try again. At least it is pretty and pink.

Here is the recipe if you want to try it... I recommend multiple days of preparation.
For the Pate Sablee:
Ingredients U.S. Imperial Metric Instructions for Ingredients 2 medium-sized egg yolks at room temperature granulated sugar 6 tablespoons + 1 teaspoon; 2.8 oz; 80 grams vanilla extract ½ teaspoon Unsalted butter ¼ cup + 3 tablespoons; 3.5 oz; 100 grams ice cold, cubed Salt 1/3 teaspoon; 2 grams All-purpose flour 1.5 cup + 2 tablespoons; 7 oz; 200 grams baking powder 1 teaspoon ; 4 grams
Directions: Put the flour, baking powder, ice cold cubed butter and salt in a food processor fitted with a steel blade.
In a separate bowl, add the eggs yolks, vanilla extract and sugar and beat with a whisk until the mixture is pale. Pour the egg mixture in the food processor.
Process until the dough just comes together. If you find that the dough is still a little too crumbly to come together, add a couple drops of water and process again to form a homogenous ball of dough. Form into a disc, cover with plastic wrap and leave to rest in the fridge for 30 minutes. Preheat your oven to 350 degree Fahrenheit.
Roll out the dough onto a lightly floured surface until you obtain a ¼ inch thick circle.
Using your cookie cutter, cut out circles of dough and place on a parchment (or silicone) lined baking sheet. Bake for 20 minutes or until the circles of dough are just golden.
For the Marmalade:
Ingredients U.S. Imperial Metric Instructions for Ingredients Freshly pressed orange juice ¼ cup + 3 tablespoons; 3.5 oz; 100 grams 1 large orange used to make orange slices cold water to cook the orange slices pectin 5 grams granulated sugar: use the same weight as the weight of orange slices once they are cooked
Finely slice the orange. Place the orange slices in a medium-sized pot filled with cold water. Simmer for about 10 minutes, discard the water, re-fill with cold water and blanch the oranges for another 10 minutes.
Blanch the orange slices 3 times. This process removes the bitterness from the orange peel, so it is essential to use a new batch of cold water every time when you blanch the slices.
Once blanched 3 times, drain the slices and let them cool.
Once they are cool enough to handle, finely mince them (using a knife or a food processor).
Weigh the slices and use the same amount of granulated sugar . If you don’t have a scale, you can place the slices in a cup measurer and use the same amount of sugar.
In a pot over medium heat, add the minced orange slices, the sugar you just weighed, the orange juice and the pectin. Cook until the mixture reaches a jam consistency (10-15 minutes).
Transfer to a bowl, cover with plastic wrap and put in the fridge.
I added the seeds of half a vanilla bean and used 1/3 honey instead of all sugar. You can adjust the sweetness of the marmalade as you go, just make sure to bring it to a boil before you add anything, then lower the heat to maintain the simmer.
For the Orange Segments:
For this step you will need 8 oranges. (I used 2 grapefruits and sliced the segments in half)
Cut the oranges into segments over a shallow bowl and make sure to keep the juice. Add the segments to the bowl with the juice.
[See YouTube video in the References section below for additional information on segmenting oranges.]
For the Caramel:
Ingredients U.S. Metric Imperial Instructions for Ingredients granulated sugar 1 cup; 7 oz; 200 grams orange juice 1.5 cups + 2 tablespoons; 14 oz; 400 grams
Place the sugar in a pan on medium heat and begin heating it.
Once the sugar starts to bubble and foam, slowly add the orange juice. As soon as the mixture starts boiling, remove from the heat and pour half of the mixture over the orange segments.
Reserve the other half of the caramel mixture in a small bowl — you will use this later to spoon over the finished dessert. When the dessert is assembled and setting in the freezer, heat the kept caramel sauce in a small saucepan over low heat until it thickens and just coats the back of a spoon (about 10 minutes). You can then spoon it over the orange tians.
[Tip: Be very careful when making the caramel — if you have never made caramel before, I would suggest making this step while you don’t have to worry about anything else. Bubbling sugar is extremely, extremely hot, so make sure you have a bowl of ice cold water in the kitchen in case anyone gets burnt!]
For the Whipped Cream:
Ingredients U.S. Metric Imperial Instructions for Ingredients heavy whipping cream 1 cup; 7 oz; 200 grams 3 tablespoons of hot water 1 tsp Gelatine 1 tablespoon of confectioner's sugar orange marmalade (see recipe above) 1 tablespoon
In a small bowl, add the gelatine and hot water, stirring well until the gelatine dissolves. Let the gelatine cool to room temperature while you make the whipped cream. Combine the cream in a chilled mixing bowl. Whip the cream using a hand mixer on low speed until the cream starts to thicken for about one minute. Add the confectioner sugar. Increase the speed to medium-high. Whip the cream until the beaters leave visible (but not lasting) trails in the cream, then add the cooled gelatine slowly while beating continuously. Continue whipping until the cream is light and fluffy and forms soft peaks. Transfer the whipped cream to a bowl and fold in the orange marmalade.
[Tip: Use an ice cold bowl to make the whipped cream in. You can do this by putting your mixing bowl, cream and beater in the fridge for 20 minutes prior to whipping the cream.]
Assembling the Dessert:
Make sure you have some room in your freezer. Ideally, you should be able to fit a small baking sheet or tray of desserts to set in the freezer.
Line a small tray or baking sheet with parchment paper or a silicone sheet. Lay out 6 cookie cutters onto the parchment paper/silicone.
Drain the orange segments on a kitchen towel.
Have the marmalade, whipped cream and baked circles of dough ready to use.
Arrange the orange segments at the bottom of each cookie cutter. Make sure the segments all touch either and that there are no gaps. Make sure they fit snuggly and look pretty as they will end up being the top of the dessert. Arrange them as you would sliced apples when making an apple tart.
Once you have neatly arranged one layer of orange segments at the bottom of each cookie cutter, add a couple spoonfuls of whipped cream and gently spread it so that it fills the cookie cutter in an even layer. Leave about 1/4 inch at the top so there is room for dough circle.
Using a butter knife or small spoon, spread a small even layer of orange marmalade on each circle of dough.
Carefully place a circle of dough over each ring (the side of dough covered in marmalade should be the side touching the whipping cream). Gently press on the circle of dough to make sure the dessert is compact.
Place the desserts to set in the freezer to set for 10 minutes.
Using a small knife, gently go around the edges of the cookie cutter to make sure the dessert will be easy to unmold. Gently place your serving plate on top of a dessert (on top of the circle of dough) and turn the plate over. Gently remove the cookie cutter, add a spoonful of caramel sauce and serve immediately.
January 30, 2010
Easy Bake cOven - Lemon Bars by Tartine

January 1, 2010
My Top Ten of 2009
I'm going to attempt to use more whole wheat flour. Not so much for health reasons, mostly because I tend to run out of all purpose flour all of the time and the whole wheat bag sits in the cupboard feeling unwanted and depressed. If I had a repertoire of more whole wheat recipes I would definitely cook with it more often.
I'm going to try hard and not skip the Daring Bakers Challenges for the whole year. This will require me to plan ahead, not procrastinate, and make some items I don't like. It is difficult when you know the recipe at the beginning of the month and don't have to post something until the very end. I might have to make up more reasons to celebrate with baked goods during the month.
I am going to make more bread. Plain and simple. I can't really say quantity-wise what "more" is equal to, I'm just going to make more of it. I have a lot of great cookbooks at my fingertips and I enjoy bread a lot. (I believe I've mentioned before bread is one of my favorite smells). It would also be nice to have more home made bread with dinners or lunches. I'm not limiting myself to just hand made either, I'll bring my bread machine to this challenge too.
I am going to post at least one non baking item each month. M and I cook a lot and I think some of these meals you might enjoy too. We have a plethora of food delivered to us twice a month from our local CSA and we cook with it each week, so why not share it too? After all, people who read this might not have the itch to bake quite as often as I do.
I would like to celebrate food more. This means all of you in San Fran might gain a few pounds with me. In an effort to appreciate the Slow Food Movement, and because M and I like to host dinners, I want to have people over more often for food. Cooking and eating together, good wine, what more could you ask for? (I haven't discussed this one with M yet, but I'm pretty sure he will be ok with it).
I think this is enough resolutions for now, I'll let you know if I come up with more later. Now, on with this recap of my favorites from '09. (What do we call 10 by the way? It seems so awkward without the "O" in front of it). Here they are in random order.
Savory Puff Pastry
I enjoyed this Challenge for Daring Bakers. We made puff pastry from scratch (which I may never do again) and I came up with this savory topping. I absolutely loved them. You can make it store bought pastry but I definitely recommend trying the filling.
Wedding Cake
Making a wedding cake is one of the highlights of my year. The challenge of it was unreal. I would love to make another if the opportunity presents itself.
Four Cheesecakes
I like cheesecake. I don't make it often because it is so terrible for you (though most of the desserts I make are not "good" for you) so I made the most of it using 4" mini spring-form pans. They were so cute and tasty. I'd definitely make some of them again.
Cookie Cake Tower
Who would not like a three layer cookie cake for their birthday? I chose this one because I felt it was creative and good. Not to forget it traveled from California to Virginia in one piece!
French Style Bread
Bread, one of the techniques I attempted to master this year. I can't say I am a master yet (hence the resolution to continue making more of it this year) but one day I might make bread like my dad numero dos. This french loaf was one of M's favorites his dad made growing up, and I wanted to continue the traditions. It makes two loaves so you can save one for later or feed a lot of people.
Carrot Muffins
Are you wondering why there is a picture of carrots here? It is because carrot muffins come from my early days of the blog when I was not obsessed with taking photos of food (or they were so good we ate them all before I could snap a shot). I didn't post the recipe in my original post so you are welcome to view it here.
Frozen Lime Pie
Not only was this a wonderful dessert, it brings back lovely memories of the Grenadines. After a week of sailing we relaxed at one of the most beautiful houses on St Lucia. Check out these amazing pictures by M. Then be sure to check out the website for the house if you feel like taking an extravagant vacation (pictures on the website do not do it justice). The house comes with the chef and two other house staff (one of which created this recipe). She also makes amazing curry chicken and mahi mahi. I'd like to be there right now.
Walnut Ice Cream with Tomato Caramel Sauce
This recipe was inspired by my desire to make our plethora of tomatoes into a dessert. It worked, it just was not as literal as eating a tomato for dessert. Hidden in a caramel sauce the tomato gave a new depth of flavor to this amazingly creamy ice cream. If you have the supplies I recommend trying it.
Mini Fruit Pizzas
I used to make this dessert a lot. I changed the recipe a little bit most recently and enjoyed it more than usual, especially served cold. A crowd pleaser when fresh berries are in season.
Cornbread
One of M's favorites. It accompanies soups, jambalaya, gumbo, fish, and whatever else we can create to go with it. I think it would go wonderful with a new recipe I came across Pumpkin Turkey Chili. Give it a try, you won't even know the pumpkin is in there. We like it so much I sometimes think we choose recipes just so we have an excuse to make it. A good reason to keep buttermilk on hand at all times.