Showing posts with label ice cream. Show all posts

March 1, 2012

Chocolate Brownie Ice Cream


Today I was assured, "It's soooo good." This is possibly one of the most unhealthy desserts I've made in a while, but who am I kidding - all dessert should be unhealthy! I'm referring to the most decadent chocolate ice cream with brownie chunks. Mmmm. My mouth is watering just thinking about it... silky chocolate ice cream with loads of pecan-studded, fudgey brownies. I had to keep myself from eating some every night this week. I left most of the ice cream for Michael and my father in law (visiting SF for a nerd conference as he likes to say) but I did cut myself a rather large slice of brownie one of those nights. Shhh, don't tell.


I've told you before how I adore David Lebovits. He's witty and silly and an incredible writer. This time, I made his basic chocolate ice cream recipe and added some brownies (another recipe of his). If you have an ice cream machine, I highly recommend his book, The Perfect Scoop. It has so many different recipes I can read for hours without making a decision. A while back I posted a Pumpkin Ice Cream and a Mint Ice Cream, both originating from his cookbook - both delicious.


The Chocolate Ice Cream is no where near low-fat and it contains both cocoa powder and dark chocolate. I changed it to dark chocolate instead of bittersweet/semisweet which by definition is hard to decipher. Dark chocolate may have less sugar and more chocolate"liquor" than bittersweet which is somewhere near this definition but probably contains more milk or sugar. Some brands may try and trick you, but a true dark chocolate should be at least 60% and my personal preference is 72%. Anything less and your ice cream will be very sweet. I used dark chocolate for the brownies too, making this a sophisticated ice cream I suppose. The brownies stayed deliciously chewy after freezing and alone are one of the best brownies I've had in a while.


Chocolate Ice Cream
Adapted (very slightly) from The Perfect Scoop, David Lebovitz
3 T cocoa powder
2 C heavy cream divided
3/4 C sugar
pinch of kosher salt or sea salt
5 oz dark chocolate chopped
5 egg yolks
1 C whole milk
1 tsp vanilla

Warm one cup of cream and cocoa powder in a heavy saucepan over medium heat. Once hot, pour over the chocolate pieces and stir with a spatula until melted. Set a strainer over the top of this bowl and set aside. In another bowl, whisk the egg yolks and prepare a bowl for an ice bath. 

Rinse the saucepan and add the remaining 1 C cream, and sugar over medium heat. Once warm, pour into the egg yolks in a slow, steady stream, whisking constantly to temper the yolks. Return the pan the burner with the eggy mix and cook over medium heat (stir constantly with a heatproof spatule) until the mixture coats the back of the spoon. To test, run your finger along the spoon vertically. If the custard runs back over your swipe, keep cooking. If not, it's ready. Pour through the strainer into the chocolate mix. Stir over an ice bath until cooled. Cover and refrigerate for a few hours until the mix is very cold. If you let it go overnight your ice cream will have a pudding consistency and be quick to churn. DL says to whisk it until you can pour it into the machine but I did not and the ice cream was still tasty. Whisking just lends itself to a more airy ice cream, mine was a little more dense. 

Churn in your ice cream maker according to the manufacturer's recommendation. 

Chocolate Pecan Brownies
Adapted (very slightly) from The Perfect Scoop, David Lebovitz
1/2 C butter
4oz dark chocolate chopped
1 scant C sugar
2 eggs
1 tsp vanilla
1/2 C flour
pinch of kosher salt
1 C chopped, toasted pecans

Preheat the oven to 350˚F and line an 8 inch square pan with foil. Spray the foil and set aside. 

Melt the butter in a saucepan over medium heat. Turn off the heat and add the chocolate, stirring until melted. Add the sugar and then the eggs one at a time. Add the vanilla and stir, then the flour. Stir until the flour is just incorporated and add the salt and nuts. 

To toast the nuts, sprinkle them into a dry pan and cook on medium heat until they become fragrant or taste like you want them to (my preferred method for checking doneness). 

Spread the batter into the pan and bake for 25-30 minutes. Mine came out at 27 and I could have taken them out just a bit earlier. Cool in the pan. Remove the foil with the brownies and set on a cutting board. Chop the brownies into little pieces and refrigerate until your ice cream has churned. You'll want about 2 cups roughly chopped for the ice cream and the rest is up to you. 

November 19, 2011

Pumpkin Ice Cream


I opened my copy of The Perfect Scoop and gasp! What? No pumpkin ice cream recipe? hmmm. Sweet potato ice cream just won't do. David Lebovitz what were you thinking not including Pumpkin Ice Cream in your book? I'm glad I wasn't the only one perplexed by this omission since you happened to post one on your blog in response to our madness...

Lebovitz has a magical way of combining cream eggs and sugar into the most delicious creamy treats. I was really happy to find a recipe he only ever so slightly changed from chef Karen DeMasco in her cookbook The Craft of Baking. You should read his blog post. It's quite witty and apparently he got some stares while walking home with a rather large but thin butternut squash (subbed squash for pumpkins).


The original recipe used canned pumpkin which I adore. I have a plethora of pumpkin recipes using canned pumpkin, and it's really my favorite. Fresh pumpkins don't usually give you the thick consistency of the canned version unless you do a lot of straining. I can never tell a difference in the end product from fresh vs canned pumpkin. That said, I decided to stick to good ole Libby's. She must have been quite the lady.


I have no idea why I never tried pumpkin ice cream until now. It seems to fit well into fall desserts and even though its cold outside, you can cozy up with a blanket and movie and enjoy some delicious spiced ice cream. Michael and I happen to do this often, and the tub of ice cream disappears at an alarming rate.


I absolutely loved this ice cream recipe. I'll be making it at least once more this winter but next time I'll have to place it on a warm slab of gingerbread cake topped with candied pecans. Yum. Good thing you can't see me drooling.


If you don't have an ice cream machine, you should at least try making the candied pecans. They are addictive and delicious and would make a great addition to your holiday cookie trays.

Pumpkin Ice Cream - David Lebovitz

Candied Pecans
1 lb Pecan halves (trader joe's are great)
1 egg white
1 T water + 1 tsp vanilla
1/2 tsp cinnamon
3/4 tsp salt
1 C sugar

Preheat the oven to 250˚F and line a rimmed baking sheet with foil. Whisk egg white until frothy and water and pour into a gallon size ziplock bag. Add in the nuts and shake to coat. In another bowl/bag combine the sugar and cinnamon and add the nuts. Make sure they are evenly coated and spread onto a rimmed baking sheet. Bake for 45 minutes to 60 minutes stirring every 15 minutes. Make sure you taste one or two after 45 minutes because they could be done then. If not, keep cooking another 10-15. Cool on tray and store in an airtight container.

September 3, 2011

Lebovitz's Mint Ice Cream

I finally let Michael eat the last scoop of ice cream this week. Mid August, I warned him I needed one scoop to photograph for the blog and he reluctantly put the tub back in the freezer and went for vanilla instead. He reminded me a few times that I needed to take photos so he could eat it, and I reminded him that I needed good light for a good ice cream photo. I also needed to be home before 7 with nothing else to do on a weeknight to make this happen. August was a busy month.

I tried a new recipe from The Perfect Scoop by David Lebovitz. I think he is currently traveling around San Francisco and I'm resisting the urge to stalk him. I might have to visit Smitten Ice Cream soon though because he gave it a pretty good review on his blog... ice cream via liquid nitrogen. hmm.


I chose real mint ice cream. Why would I do such a thing you ask? Well, I have a garden now... you could say I'm developing a green thumb, and I'm growing mint. Mint is an easy plant even if you have a black thumb. Just beware as it is likely to take over areas of your garden unless confined to a pot. My mint is weird. It has smaller leaves and when it gets tall the leaves start to turn purple (this may mean my window box is too small). I used it anyways, even some of the purple, and it turned into a very refreshing ice cream. I added chocolate chips of course because mint needs the best flavor companion possible and I was a bit nervous about the strong fresh mint taste. If all else failed, at least the would be chocolate.

I liked it, I think Michael liked it too. He ate most of it anyways with bits of leftover cake that I didn't make into cake pops. My preference is still peppermint extract flavored ice cream, but this one was nice for a change, and nice to be able to use something I've grown in a recipe.


Mint Ice Cream
The Perfect Scoop, David Lebovitz

 1 C whole milk
1/4 C sugar
2 C heavy cream
5 large egg yolks
2 C fresh packed mint leaves
1 C roughly chopped chocolate (mini chocolate chips work well too) my addition

Heat milk, sugar, and 1 C cream in a heavy bottom saucepan. Add the mint leaves and steep for one hour. This means stir them up and cover with a lid. Go do some sit-ups since you'll be eating this later, and and strain the mixture through a fine mesh strainer. Make sure you push leaves against the strainer to extract as much liquid as possible. Lebovits says your cream will be a lovely shade of emerald, but mine was barely green. Warm this mix back up on meduim heat.

In another bowl, whisk the egg yolks. Once the milk is warm, slowly add the milk, whisking constantly, to the eggs and then return all of this to the pot and continue to heat until the mixture is thick enough to coat the back of a spoon. Stir constantly and try not to let anything burn to the bottom.

In another bowl (more dishes please!) add the remainder of the cream and set the mesh strainer on top (remove leaves). Pour the minty custard through the strainer again to eliminate scrambled eggs in your ice cream and stir into the cream. Place over an ice bath to help cool. Cover and refrigerate overnight or at least four hours. You can add green food coloring now.

Prepare the ice cream according to your machine manufacturer's recommendations. Be sure you've frozen your bowl for as long as required or your ice cream will never get thick. Freeze again for a few hours until it's scoopable, about 4 hours.

Ice cream takes a while, so it's best to plan ahead if your're making it for an event!

Happy Churning!


July 8, 2011

Apricot Blueberry Cobbler

The other night I blew up a pyrex in my kitchen. I realize now I shouldn't put my trust in a brand name that has been around forever, claiming you can transfer your bakeware from freezer to oven and such. I could trust something made in the 1920's but not recently. They changed the glass product from borosilicate glass to soda-lime glass which can't handle the swing in temperatures and results in a shatter. I lost some good pastry cream and spent way too much time cleaning little glass shards out of my kitchen. Note to bakers: don't use pyrex on the stovetop (and definitely use caution in the oven with change in temperature). This little disaster put a bit of a hold on my baking for a while. I remade my pastry cream and finished a birthday tart for my office, but since then, I haven't been baking much. sigh.

Kitchen disaster behind, I decided to use some new ramekins to make individual apricot blueberry cobblers. Sugar Dough was the monthly recipe for June over at the Easy Bake cOven  and since I had some very ripe fruits in my fridge, I put together this incredibly simple dessert.

I think most people are more familiar with cobbler that has a fruit filling and a sugar dough topping. Sugar dough may range from a biscuity dough to a thick crumble, and even hunks of bread. The sugar dough recipe we used came from the restaurant stove in Portsmouth, Virginia. I was reading a blog post the other day and someone said they were skeptical of restaurants who published their recipes. Would they leave something out? Why would they reveal their secrets to ordinary people? Well, I can't tell you the answers to these questions, but I'm glad that some restaurants are confident enough to do it. I have a feeling knowing Stove's recipe will not keep Sarah & Eric from going back! Thanks for picking this recipe, it was fantastic!


Mini Fruit Cobbler 
you can use any stone fruit or fruits that won't obliterate when cooked

for one 10 oz ramekin:
slice 3 small fruits into a buttered ramekin
add 2 tablespoons blueberries
break up 1 scant tablespoon of butter and distribute evenly
sprinkle 1 tablespoon of sugar over the top
top with sugar dough and press lightly into the fruit (about 1/2 to 3/4 cup)
set ramekins on a baking sheet
bake for 20-25 minutes at 350˚F or until the fruit is bubbly

Stove’s Sugar Dough
This is not a dough for rolling, you have to pat this dough out into the pan your using for dessert. It’s rich and wonderful and can also be made into a short bread as well. I have even used it for bottoms of pans mixed with pecans and then a cake batter over that for a crunch factor. Just don’t over mix it or you will have some good rubber dough

1 cup white sugar, baker’s sugar if you can find it
1lb unsalted double A butter
6 cups of all purpose flour, (unbleached and without chemicals if possible, King Arthur is good stuff and easy to find)

In the bowl of a 4 to 6qt. mixer cream the sugar and butter until light and somewhat fluffy. Stop the machine, scrape down sides and add all at once 6 cups of flour, raise the bowl and on the lowest speed blend the dough until it pulls together. If it’s winter and your environment isn’t warm you may need to spray from a mister water a little at a time till the dough starts to combine. Pinch a bit of dough to see if it will hold together, if so it’s ready for use. 


this dough stores in the refrigerator for a week or so. It also makes a ton, so feel free to half the recipe.

October 28, 2010

Halloween! It's so close I can taste it....


Holidays are fun to make treats for, especially Halloween! There are parties to attend and parties to throw and parties to organize for your children (or yourselves if you live in sf where everyone seems to be crazed by Halloween well over the age most people dress in costume). If you are going to a party or just want to make something really cute, I have some ideas for you. Some are links, some are my own recipes, but all are good and fun. 


1. Vampire Bites
My sister was feeling extra crafty the other day and decided to make these Apple andPeanut Butter Sandwiches for my nephews's Halloween party at their day care. A little less sugary than all the cupcakes, cookies, and candy kids consume and easy to make. They were so cute I was inspired to share some of my favorite Halloween treat ideas with you. Most of them are links to other blogs so I hope you enjoy and feel inspired too! 


What you need:
Red Apples (the darker the skin the better) or you could go super stylish and have different shades of vampire lipstick...
Peanut Butter
Marshmallows (small and large)
Slice apples into thin wedges cutting out the core, spread some peanut butter on the insides of two slices. line the curved side with some small marshmallows for teeth. Cut the large mallow (you can use scissors) into pointy teeth and add two of these for fangs. Voila. Simple and fantastic. Just look how much my cute little nephew likes them!


2. Boo-tiful Ghost Cake
How can you resist these cute little marshmallow ghosts? Annie of Annie's Eat's has been on a rampage of all things cute and halloween the past few posts. Please check out her blog - you might be blown away by all of these cute treats. 

3. Witches Fingers Cookies
I first had these cookie in college when a friend's mom made them for a halloween party for some church folks. Other great memories from this night were M dressed as a pink flamingo lawn ornament... and a fantastic bird bath and garden gnome were also present. 

4. Caramel Apples
These are one of my favorite things... if you look closely you will see me staring longingly into the display case at these beauties. We didn't buy one though (sad face) we bought a giant sugary disc some may know as an elephant ear? Anyways, I love caramel apples. We used to get them at a local apple orchard when we were younger. At some point we got lazy (or my parents decided they were too expensive) and just bought caramel dip from the grocery store - dangerous - but I'm returning to one of my all time favorites for number 4. 

Food Network Recipe - caramel from scratch
All Recipes - caramel pieces recipe
Be creative with your toppings!

5. No-Bake Spiderweb Cheesecake
Martha's army is at it again. Spiderweb treats are very cute and creepy. Even better if you can find gummy spiders to decorate with. This cheesecake seems easy enough since you don't have to bake it. No-Bake cheesecake is definitely a time saver when you are planning a party! 

6. Devil's Food Cake with Flame Tuiles
Maybe for a more sophisticated crowd. This cake just looks sexy. Fit for a vampire (but not the Twilight kind - they are too nice for this cake). 
Another Martha. She is just too good at holiday baking. 

7. Spooky Drinks
This cocktail reminds me of a Moscow Mule (slowly making a come back  in SF) but with Rum instead. You could pretty much top any cocktail with black decorating sugar and spiders but I'll share the recipe anyways. 

8. Pumpkin Cookies
Yep, I just posted about these the other day! (self promotion) They were one of three recipes for the Easy Bake cOven's October recipe list. 


9. Pumpkin Ice Cream Sandwiches


To make Ice Cream Sandwiches, thaw your favorite pumpkin ice cream at room temperature until easy to scoop. Using a spoon or small ice cream scoop, add some ice cream to the flat side of one cookie and flatten it slightly. Place another cookie on top and smooth sides. Keep in freezer until ready to eat. It might be good to under-bake your cookies slightly so they don’t get hard in the freezer. 


10. Mini Mummy Dogs (Halloweenies)

I made these with my sister for Halloween last year. She is just so crafty right? I think she has a picture somewhere on her camera but I don't have it (ahem....) Ours were cuter, because we used little smokies. Use hot dogs if you like, and wrap with crescent roll dough cut into thin strips. The thinner the better. 
Here is the link in case you forget (little smokies + crescent roll dough) hehe

What is your favorite Halloween Treat? 

August 1, 2010

Easy Bake cOven - Chow's Ginger Cake

I was a little scared about the ginger cake. I'm not a huge ginger fan, especially fresh ginger, because it can be so overpowering. I am happy to say that I really enjoyed this cake! Thanks Gretchen for choosing this recipe. 


We have been so busy lately, I waited until Thursday night to make the cake... and the caramel.... but I did plan ahead and made Vanilla Bean Ice cream to accompany it. Yum! Apparently, July was National Ice Cream Month. Had I know about this sooner, I think I would have tried making some more ice creams. I love ice cream! It is one of my favorite desserts, and making it at home is so easy. I might make August into my own "Christina Loves Ice Cream Month... and it is Her Birthday Month so Why Not Eat a Lot of Ice Cream Month." Looking forward to this idea.... 


Back to the cake. The recipe made way too much batter for one 9 inch pan as was called for in the recipe. I ended up filling one pan pretty full... then second guessing the rules and adding the rest to a 6 inch pan. Even then, they were both really full and very tall. I was pretty worried it was going to spill over and create a mess for me in the bottom of the oven. Thankfully that didn't happen, and the cake just kept rising taller and taller. I have no clue if the Chow cake is tall like mine, but I can say that I liked it. I used half the amount of fresh ginger that was called for and probably like it better this way. I bought a large seeming chunk of ginger and once it was grated, there was a lot less than expected. 


This cake is one of those that gets better with age. I snuck a bite while I was photographing it and it was much better than the first night. Sorry to my guests who had to eat it warm from the oven... oh so terrible! I suggest if you enjoy gingerbread or gingerbread men, or ginger in the slightest you should try this cake. Thanks CHOW for making something so lovely, and allowing the Chronicle to post it for us all. 


Chow's Ginger Cake With Caramel Sauce & Whipped Cream

The secrets:

Two kinds of ginger: Loads of fresh ginger, backed by the powdered product, gives the cake a fresh spike of flavor. Dark molasses: This adds a rich, earthy element to the blend. Warming before serving: While the cake is good cold, it tastes even better gently reheated in the oven. Caramel sauce: The caramel adds a pleasant dose of sweetness and sets this cake apart. Serves 16
Ginger cakeButter and flour to prepare pan
2 ounces ginger, peeled and finely grated on a Microplane (about 3 tablespoons)
1 cup sugar
3/4 cup rice bran oil or other neutral flavored oil
3/4 cup dark molasses (see Note)
4 large eggs
2 1/2 cups all-purpose flour
1/2 teaspoon cinnamon
1/2 teaspoon ground cloves
1/2 teaspoon ground white pepper
1/2 teaspoon ground ginger
1 tablespoon baking soda
Caramel sauce1/2 cup sugar
1 1/2 teaspoons light corn syrup
1/2 teaspoon cream of tartar
1 cup heavy whipping cream at room temperature
1/4 teaspoon kosher salt
1/4 cup unsalted butter (1 stick), cut into pieces
Whipped cream1 cup very cold heavy whipping cream
1/4 teaspoon Tahitian vanilla extract
1 tablespoon powdered sugar, + more to garnish
For the cake: Preheat oven to 350°. Lightly butter TWO 9- by 9-inch cake pans and dust very lightly with flour or line with parchment paper (see Note).
Combine ginger with 1/2 tablespoon water in a mixing bowl; add sugar, oil and molasses. Mix on low speed. Add eggs; continue mixing at low speed until fully incorporated.
Combine flour, cinnamon, cloves, white pepper, ground ginger and baking soda in another mixing bowl. Add dry ingredients slowly to the egg mixture, continuing to beat slowly, scraping mixing bowl occasionally. Increase speed to medium for 2 minutes. Scrape; decrease speed to low and slowly add 3/4 cup hot tap water. Mix until just combined, occasionally scraping. (The batter will be slightly thin.)
Pour into prepared cake pan and bake until a toothpick comes out clean, about 40-45 minutes.
For the caramel sauce: In a medium-size stainless steel pot, combine sugar and 1 3/4 cups hot water, stirring until sugar dissolves. Add corn syrup and cream of tartar; mix. Wipe down the inside of the pot with a wet towel to remove any sugar crystals. If needed, also brush inside of pot just once with a wet pastry brush. Bring to a boil over high heat without stirring, until mixture becomes a deep caramel color or a candy thermometer reaches 335°.
Remove pot from heat and immediately add cream in a slow stream while stirring (be careful - it will pop and sputter). Whisk in salt and the butter, a little at a time.
The caramel sauce can be made ahead and refrigerated. Carefully reheat in a water bath or in a microwave before using. Makes approximately 2 cups.
For the whipped cream: Vigorously whisk cream, vanilla extract and powdered sugar in a cold bowl until the cream reaches soft peaks. You want the cream to be relatively soft so it can slowly run over the sides of the cake. Makes about 2 cups; refrigerate leftovers to use another time.
To finish: (At Chow, the cake is cut into 2-inch squares and reheated 2 1/2 minutes in a 350° oven.) Place the cake square in a shallow bowl, top with caramel sauce and a dollop of whipped cream. Finish with a dusting of powdered sugar.
Note: If you plan to turn the cake out of the pan before cutting, also use the parchment paper, which helps the cake release more easily. Dark molasses (also labeled "full") is more intensely flavored and less sweet than light or mild molasses. Avoid using blackstrap, which is less sweet and has a stronger flavor than dark molasses.

March 29, 2010

Strawberry Frozen Yogurt

I had a pint of strawberries left over from making Strawberry Cupcakes for my office. Since the strawberries were perfectly ripe and M and I would have made ourselves sick to eat them all before they got mushy, I turned these beauties into a delicious frozen yogurt. Fro-Yo has gained a following here in California beginning with Pink Berry in LA, and moving into every San Fran neighborhood with names like Tuttimelon and Yocup. It's tangy, and topped with your choice of fresh fruit or candy pieces. My yogurt didn't come out of a machine in a cute little twist, and the fresh fruit was incorporated into the mix, but it was just as good (and maybe a little more sweet than its corporate counterpart).
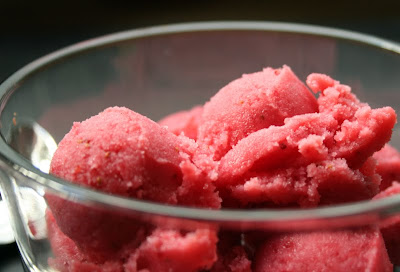
Have you bought your ice cream machine yet? Good, then you will be able to enjoy this low fat ice cream with me. I took a chance and changed the full fat yogurt requirement to the thickest, creamiest fat free yogurt I know, Mountain High Yoghurt. It's what I eat for breakfast most days, and thick enough to make a tasty yogurt. When you make your own, be sure to get Plain yogurt, preferably with no added mystery ingredients or sugars. Then, find some strawberries, slice them, and macerate them with sugar and vodka for one hour. Go have a huge slice of pizza from your local pizzeria. Come back and add in some lemon juice and yogurt and give it all a whirl in the food processor until smooth. Refrigerate until it's chilled and freeze in your ice cream maker. Freeze for at least 4 hours and enjoy.
It's that simple, and delicious. It makes me happy for spring and all of the fruits that will soon be back in season. I heard the strawberries at the Farmers Market looked fabulous, and I can't wait to see what my CSA will deliver soon.
Strawberry Frozen Yogurt
1 pint fresh strawberries
2 tsp Vodka
2/3 C sugar
1 tsp fresh lemon juice
1 C fat free thick yogurt (if it is not thick enough, strain through some cheesecloth over a wire mesh strainer and drain until it is thick enough to scoop and leave a spoon mark)
Hull Strawberries and slice them in quarters. Add them to the bowl of a food processor with the Vodka and sugar. Pulse to coarsely chop, cover and rest for one hour. Add the yogurt and lemon juice and process until smooth. Chill in your fridge (or your freezer if you are impatient) and freeze in your ice cream machine about 25 minutes. Place in a plastic container and freeze for at least 4 hours before you eat it. Enjoy! And feel less guilty since you used fat free yogurt!

March 3, 2010

a tiny Carrot Cake, a giant scoop of Goat Cheese Ice Cream

I've posted about carrot cake before. It is my favorite, so I continue to fill your thoughts with cream cheese frosting and dense, spicy, moist cakes. I'm still trying to figure out why one of my friends doesn't like cake.... to counter balance this un-likeness of cake, I have another friend who is mildly obsessed with my carrot cake. I oblige and make them at her request. She is a loyal supporter of the "dream bakery" and asked me recently to make a cake for her significant other's birthday.
I also threw out the idea of home made ice cream to pair with the cake. I had no idea which flavor, so I consulted the ice cream genius David Lebovitz directly. He responded (yay! I was really excited he answered my question) and suggested Cream Cheese Ice Cream or Goat Cheese Ice Cream. I ran it past my carrot cake fanatic, and she decided on the Goat Cheese Ice Cream. David Lebovitz also suggested adding some rum soaked raisins to the mix might be good, so I followed suit.
How delightful to make cake and ice cream for a birthday. I made a 6 inch cake with 3 layers, cream cheese frosting, and toasted walnuts. I like the walnuts on the sides. I fell in love with the look in college at a local coffee shop. They served giant slices of carrot cake with walnuts decorating the sides, and it looked so pretty in the case.... so tempting. The only ingredient I have mixed feeling about is the raisin. Sometimes I like them, sometimes they are a little overwhelming. I like to change it up and use currants instead of raisins sometimes, especially if making it for myself, because they are smaller and sweeter than your typical raisin. I usually let the paying customer choose this battle.
The goat cheese ice cream was interesting to make as well. It's simple. It tastes like sweet, creamy (yet icy), sweet goat cheese. If you're not a goat cheese fan don't try this at home. If you are... and you are weeping because you don't have an ice cream maker... don't fret! I have a feeling you can make this without one. After preparing the custard and mixing it with the cheese, you can freeze it in your ice cream maker (but this doesn't freeze the same as most ice creams) or you can mix it together really really well, place it in the freezer, and take it out and stir it every hour until it is thick enough to add some rum soaked raisins. Then let it freeze overnight. The reason I say this is because in the ice cream maker (since there is no whipping cream in the mix), the ice cream doesn't increase in volume, it just chills really well, and it looks curdled rather than smooth. The curdles smooth out during freezer time - and this is why I think it is unnecessary to churn. I imagine you can do the same with Cream Cheese Ice Cream.
Let me know how it goes in case you try this without one. The end result of cake and ice cream turned out well. The sweets were praised (how nice) and commended on their original pairing. Thanks to David Lebovits for the suggestion. And thanks to my friends for enjoying my baking so much!
Goat Cheese Ice Cream
adapted from The Perfect Scoop, by David Lebovitz
makes 1 pint
2 1/4 C whole milk
1 C sugar
11 oz goat cheese
9 egg yolks
Mix the milk and sugar together in a medium saucepan, set over medium heat. Remove the goat cheese from the packaging and place it in a large bowl. Mix it up with a fork and set a mesh strainer over the top.
In another bowl, whisk the egg yolks. After the milk is warm to the touch, slowly temper the egg yolks and return the mix to the saucepan. Continue cooking over medium heat making sure to scrape the bottom of the pan to prevent burning, until it coats the back of the spoon. (to test this, run your finger down the back of the spoon and see if the custard leaves a nice straight line - if it does, it is ready, if not keep heating).
Pour the custard through the mesh strainer into the goat cheese. Stir the mixture until the cheese is melted and set the bowl in an ice bath and stir until the mixture is cooled. Cover with plastic wrap and refrigerate until it is completely cooled.
Freeze in your ice cream machine, or do as I said above if you don't have one!
Carrot Cake
adapted from Birthday Cakes, by Kathryn Kleinman
(Full Recipe for 3 - 9" Layers)
1 C dark raisins
1 lb carrots (about 4 C shredded - you can leave skins on)
2 C minus 2 T flour
2 tsp baking powder
1 tsp baking soda
1 tsp salt
2 tsp cinnamon
1 T cocoa powder
4 eggs
2 tsp vanilla
1 C sugar
1 C dark brown sugar
1 1/4 C oil
1 1/2 C walnuts - roughly chopped
divide oven into thirds. Preheat to 350˚, butter and line 3 9" pans with parchment. dust with flour. steam the raisins covered 10 mins (alternately add some water to a heat proof bowl and microwave covered for 30 seconds or so to plump). Drain and reserve.
Sift dry ingredients. In a large bowl, beat eggs, then beat in vanilla, sugars, and oil. Mix in dry ingredients until just incorporated, then stir in the carrots, raisins, and nuts.
Divide among pans. Bake about 35 minutes - until the cakes start to pull away from the edges of the pans. Remove from the oven and cool on wire racks for 3 minutes. Turn onto a rack right side up. Once completely cool, wrap and freeze for one hour. (Overnight works great). Frost using Cream Cheese Frosting recipe! This cakes serves a crowd. It is really dense and tall so you can get a lot of slices from one cake. If you half the recipe you can make 3 6" cakes, or 18 regular cupcakes.
Cream Cheese Frosting
16 oz cream cheese (full fat)
1 stick butter
1 tsp vanilla
2 C powdered sugar
Beat butter and cream cheese (room temp please!) for a few minutes until fluffy. Add vanilla and sugar. Continue beating on high speed until smooth, scraping sides of bowl. Makes enough to frost 3 layers of cake plus sides.

you might also like...

Related Posts Plugin for WordPress, Blogger...