For a multitude of reasons, I've decided to host this blog on Wordpress. I hope you don't mind! And if you'd like to continue following my posts, please sign up there!
June 9, 2012

April 4, 2012
Naturally Dyed Easter Eggs

How to hard boil an egg:
Fill a medium pot with eggs and cover with about one inch of water. Bring to a boil and boil for 2 minutes. Remove from heat and cover with a lid. Let stand for ten minutes and put in an ice bath. Keep refrigerated for 3-4 days.
I have no specific recipe for the dyes I used. I added 1 tsp of vinegar to the coffee and used about 3 C water and 2 T of turmeric and 1 tsp vinegar for the yellow eggs. I like how bright they turned out with speckles, but I also really like the grayish-purple the red wine vinegar created. Check out Bon Appetit for some guidelines on other natural dyes.
If you're not into chicken eggs, try Martha's Chocolate Truffle Eggs even though they are so gorgeous you won't want to eat them. Oh, who am I kidding, any kind of chocolate no matter how pretty must be eaten immediately! Happy Easter and Happy Egg Dyeing.
March 28, 2012
Red Velvet Cake
I have a hard time passing up an opportunity to make someone a birthday cake, especially when that someone is a friend I've known for almost ten years. And even better, that someone really really likes my baking.
 People have very different reactions to red velvet cake. Every time I mention it to one of my friends, she immediately quotes Steel Magnolias "... people are gonna be hacking into this poor animal and it'll look like its bleeding to death!" which she can do surprisingly well. And though these cupcakes were not tiny armadillos with gray icing, they were pretty tasty. Others have an aversion to using large amounts of food coloring and use beet powder to tint the cake, and some just stick with no food coloring since a true red velvet is not actually red (it's an ugly brownish color from the cocoa powder in the recipe). I like a red cake myself piled high with cream cheese frosting, but tend to alternate with regular buttercream depending on who I'm baking for. Both are delicious accompaniments to this lovely cake. I hope you enjoy it as much as we did.

March 1, 2012
Chocolate Brownie Ice Cream


I've told you before how I adore David Lebovits. He's witty and silly and an incredible writer. This time, I made his basic chocolate ice cream recipe and added some brownies (another recipe of his). If you have an ice cream machine, I highly recommend his book, The Perfect Scoop. It has so many different recipes I can read for hours without making a decision. A while back I posted a Pumpkin Ice Cream and a Mint Ice Cream, both originating from his cookbook - both delicious.
The Chocolate Ice Cream is no where near low-fat and it contains both cocoa powder and dark chocolate. I changed it to dark chocolate instead of bittersweet/semisweet which by definition is hard to decipher. Dark chocolate may have less sugar and more chocolate"liquor" than bittersweet which is somewhere near this definition but probably contains more milk or sugar. Some brands may try and trick you, but a true dark chocolate should be at least 60% and my personal preference is 72%. Anything less and your ice cream will be very sweet. I used dark chocolate for the brownies too, making this a sophisticated ice cream I suppose. The brownies stayed deliciously chewy after freezing and alone are one of the best brownies I've had in a while.

Chocolate Ice Cream
Adapted (very slightly) from The Perfect Scoop, David Lebovitz
3 T cocoa powder
2 C heavy cream divided
3/4 C sugar
pinch of kosher salt or sea salt
5 oz dark chocolate chopped
5 egg yolks
1 C whole milk
1 tsp vanilla
Warm one cup of cream and cocoa powder in a heavy saucepan over medium heat. Once hot, pour over the chocolate pieces and stir with a spatula until melted. Set a strainer over the top of this bowl and set aside. In another bowl, whisk the egg yolks and prepare a bowl for an ice bath.
Rinse the saucepan and add the remaining 1 C cream, and sugar over medium heat. Once warm, pour into the egg yolks in a slow, steady stream, whisking constantly to temper the yolks. Return the pan the burner with the eggy mix and cook over medium heat (stir constantly with a heatproof spatule) until the mixture coats the back of the spoon. To test, run your finger along the spoon vertically. If the custard runs back over your swipe, keep cooking. If not, it's ready. Pour through the strainer into the chocolate mix. Stir over an ice bath until cooled. Cover and refrigerate for a few hours until the mix is very cold. If you let it go overnight your ice cream will have a pudding consistency and be quick to churn. DL says to whisk it until you can pour it into the machine but I did not and the ice cream was still tasty. Whisking just lends itself to a more airy ice cream, mine was a little more dense.
Churn in your ice cream maker according to the manufacturer's recommendation.
Chocolate Pecan Brownies
Adapted (very slightly) from The Perfect Scoop, David Lebovitz
1/2 C butter
4oz dark chocolate chopped
1 scant C sugar
2 eggs
1 tsp vanilla
1/2 C flour
pinch of kosher salt
1 C chopped, toasted pecans
Preheat the oven to 350˚F and line an 8 inch square pan with foil. Spray the foil and set aside.
Melt the butter in a saucepan over medium heat. Turn off the heat and add the chocolate, stirring until melted. Add the sugar and then the eggs one at a time. Add the vanilla and stir, then the flour. Stir until the flour is just incorporated and add the salt and nuts.
To toast the nuts, sprinkle them into a dry pan and cook on medium heat until they become fragrant or taste like you want them to (my preferred method for checking doneness).
Spread the batter into the pan and bake for 25-30 minutes. Mine came out at 27 and I could have taken them out just a bit earlier. Cool in the pan. Remove the foil with the brownies and set on a cutting board. Chop the brownies into little pieces and refrigerate until your ice cream has churned. You'll want about 2 cups roughly chopped for the ice cream and the rest is up to you.
February 23, 2012
Feed the Birds
.JPG)
So I bought a cute little feeder and have been mother to a variety of hummingbirds since. I did my research and found that the red hummingbird food they sell everywhere is not good for their digestive tracts; no one likes red dye #40. The Lovely Lady Baker would have it no other way than to make some food from scratch each week. It's incredibly simple and I know I'm not going to kill any birds. Now, if I could just get rid of those pigeons...
.JPG)
Hummingbird Nectar
1 part sugar to 4 parts water
I started making 1/2 C sugar and 2 C water so that I could store it in my fridge and not have to make it as frequently.
Pour sugar and water into a heavy bottom small saucepan. Turn the heat on medium-high. If you have a gas stove, a good rule of thumb is to turn the fire up enough so that the flames are as wide as the pot but don't go up the sides. Bring to a light boil and continue to boil for 2 minutes. Cool and store in an airtight container in the fridge for one week. Replace as needed.
February 8, 2012
30 is the new 29

I know a lot of people born in 1982 and you know what that means... they will all be turning 30 this year. Thirty is a big deal. People have extravagant parties and destination parties and I happen to be going to two before May. I'm also happy to report I was born in '83. There is still time! Apparently I need to start planning something amazing. Oh, and I'll need to begin my list of Thirty before Thirty (the 30 things you want to accomplish before you turn thirty). Until then, I'll keep baking you cakes!
Heed these words of wisdom from Lucille Ball, "The secret to staying young is to live honestly, eat slowly, and lie about your age." HAPPY BIRTHDAY to all my 30-somethings and a pre-happy birthday to those of you who will soon be thirty (aka my sister!).

Cakes worthy of a 30th Birthday Celebration
December 21, 2011
Merry Merry Gingerbread Men

I wish there was a magical recipe generator that combined the best recipes on one website... then I would waste less time looking through hundreds of recipes! Until this exists, I will trust a tried and true method... asking friends. My friend Nicole suggested I make a recipe for gingerbread cookies from Not Without Salt (a fantastic blog by the way). Nicole and I would make a mean baking duo if we lived in the same city again....
When I read through the recipe I was nervous about the amount of black pepper. I like spiced cookies, but was a little unsure of spicy cookies. Nicole assured me they were great, so in the end I used about half of the black pepper called for just to be sure. I made gingerbread cookies for a dinner party we had with some friends. I thought it would be fun to decorate them all together and it was! I'd like to make this into a tradition, decorating cookies that is, no matter who comes to the table. Traditions give meaning to otherwise meaningless baking and I think creating a tradition of gingerbread cookie decorating would be great.

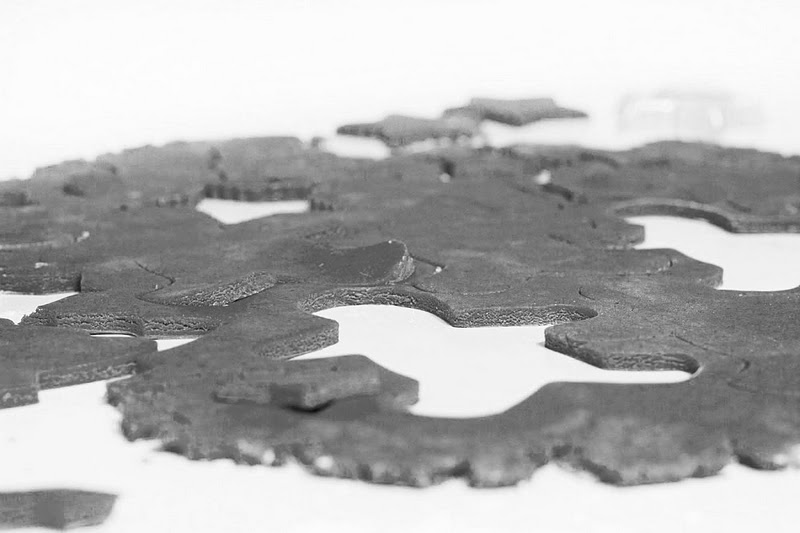

(I added only 1 tsp of black pepper)
November 19, 2011
Pumpkin Ice Cream

I opened my copy of The Perfect Scoop and gasp! What? No pumpkin ice cream recipe? hmmm. Sweet potato ice cream just won't do. David Lebovitz what were you thinking not including Pumpkin Ice Cream in your book? I'm glad I wasn't the only one perplexed by this omission since you happened to post one on your blog in response to our madness...
Lebovitz has a magical way of combining cream eggs and sugar into the most delicious creamy treats. I was really happy to find a recipe he only ever so slightly changed from chef Karen DeMasco in her cookbook The Craft of Baking. You should read his blog post. It's quite witty and apparently he got some stares while walking home with a rather large but thin butternut squash (subbed squash for pumpkins).

The original recipe used canned pumpkin which I adore. I have a plethora of pumpkin recipes using canned pumpkin, and it's really my favorite. Fresh pumpkins don't usually give you the thick consistency of the canned version unless you do a lot of straining. I can never tell a difference in the end product from fresh vs canned pumpkin. That said, I decided to stick to good ole Libby's. She must have been quite the lady.


I have no idea why I never tried pumpkin ice cream until now. It seems to fit well into fall desserts and even though its cold outside, you can cozy up with a blanket and movie and enjoy some delicious spiced ice cream. Michael and I happen to do this often, and the tub of ice cream disappears at an alarming rate.

I absolutely loved this ice cream recipe. I'll be making it at least once more this winter but next time I'll have to place it on a warm slab of gingerbread cake topped with candied pecans. Yum. Good thing you can't see me drooling.

If you don't have an ice cream machine, you should at least try making the candied pecans. They are addictive and delicious and would make a great addition to your holiday cookie trays.
Pumpkin Ice Cream - David Lebovitz
Candied Pecans
1 lb Pecan halves (trader joe's are great)
1 egg white
1 T water + 1 tsp vanilla
1/2 tsp cinnamon
3/4 tsp salt
1 C sugar
Preheat the oven to 250˚F and line a rimmed baking sheet with foil. Whisk egg white until frothy and water and pour into a gallon size ziplock bag. Add in the nuts and shake to coat. In another bowl/bag combine the sugar and cinnamon and add the nuts. Make sure they are evenly coated and spread onto a rimmed baking sheet. Bake for 45 minutes to 60 minutes stirring every 15 minutes. Make sure you taste one or two after 45 minutes because they could be done then. If not, keep cooking another 10-15. Cool on tray and store in an airtight container.
November 13, 2011
Dreamy Coconut Cake

This may be one of the prettiest cakes I make. I have used sweetened shredded coconut and unsweetened flakes before, and I actually like the flakes much more. Less sugar, more flavor. I think the big flakes make it more dreamy than the tiny shreds. I like to sandwich the layers with lemon curd. It creates a nice tart balance to the sweet cake and cream cheese frosting.
Coconut Cake
2C cake flour
1 1/2 C all purpose flour
3/4 tsp salt
3/4 C butter
1 1/2 C sugar
4 eggs
1 tsp vanilla
2 tsp coconut extract (I like Flavorganics brand)
1 14oz can coconut milk, full fat not low-fat
Lemon curd (store bought or home made)
3-4 C flaked coconut
Preheat the oven to 350˚F. Spray two 9" pans or grease with butter and add parchment rounds to the bottom. Grease the parchment and set aside.
Cream the butter and sugar together. Add in the eggs and whip until light and fluffy. Add in vanilla and coconut and combine. Whisk the remaining ingredients. Shake up the coconut milk to combine the water and cream together. Add 1/3 of the flour mix and combine until almost all of the flour is moistened. Add 1/2 the coconut milk and repeat, ending with the flour. Spread evenly between two pans and bake for 25-30 minutes. When the cake is done it will spring back lightly when you press in the center and a cake tester will come out clean.
Cool for 5 minutes and remove from pans to cool on a wire rack completely.
For the Frosting...
Cream Cheese Frosting
16 oz cream cheese room temperature
1/2 C butter room temperature
1 tsp vanilla
2 C powdered sugar
Cream the butter and cream cheese in a stand mixer with the whisk attachment until light and fluffy, about 5 minutes. Add in vanilla. Add powdered sugar a little at a time on low speed. Once all the sugar is in, scrape the sides of the bowl and raise the speed to medium-high and beat another 5-10 minutes or until bright white and fluffy. If it seems to soft to frost, cool in the fridge for 15 minutes.
To assemble the cake...
Cut domes off the top of the cakes and cut each in half to make 4 layers. Pipe a 1/2 inch border around the edge of the cake with the frosting. Spread 1/3 C lemon curd on the bottom layer and place another cake on top. Continue to the top layer but refrain from adding the lemon curd to the top. Frost the entire cake and press flaked coconut into the sides and top until well covered. Chill to set, remove from the fridge at least 1 hour before serving.
October 30, 2011
Happy Halloween

We jumped from dark rooms into dark hallways to scare other diners in a creepy empty top floor, and walked through a staged "Haunted House." We also drank some interesting cocktails by Cocktail Lab complete with basil seeds and rum that look and feel texturally like you are chewing on eyeballs. They also made a "Hannibal Lecter;"a whisky sour with chianti poured over a spoon on top to keep the colors separated, which I liked much more than the first.


The chef's behind the Stag Dining Group created a great menu for the night:
Crab Puffs - Togarashi, lemon
Roasted Beets & Carrots - goat cheese mousse, preserved lemon-honey vinaigrette, rye crumble
Squid Ink Chowda - lobster, kabocha squash, clams
Baby-Back Ribs - smoked maple glaze, apple celery root slaw
"Drumstick" - dark and stormy brownie, rum ice cream, waffle cone
I can't complain much about the food, only a little about the timing. It was fun and provided a good test run of the costumes.
Saturday I spent a majority of the day decorating the house with spider webs and fake plastic spiders for our grown-up Halloween party. I also tried a new recipe for sugar cookies. They are super soft and puffy and very much like the kind you buy in the grocery store... you know, the round ones with sprinkles coordinating with every holiday. The recipe is great. The cookies are not overly sweet and pair well with the buttercream frosting. I prefer buttercream on cookies as opposed to royal icing decorated cookies - the buttercream tastes so much better. The recipe I tried came from Sweet Pea's Kitchen and I didn't change a thing (except on the second batch I rolled them a bit less than 1/4"). The general consensus was good and Michael really liked them. I believe his exact words were, "Those cookies are the Bomb!" Then we laughed and high-fived. This is the key to a good marriage.
Hopefully I'll get to hand out some candy to neighborhood kiddies this year since we have a front door! I think I'll refrain from my creepy Black Swan costume as well... no need to terrify the little ones.


Happy Halloween!
October 16, 2011
Successful French Macarons!

Last month, I had a Fight with French Macarons. Literally. They stuck to my parchment and the tops cracked a bit. I had no idea why, so I decided to take a class from Richard at Baking Arts here in San Francisco. Richard is pastry genius and a fantastic teacher. His classes range from the most simple biscuit and scones to intricate sugar flowers and souffles. He's a stickler for his favorite brand of chocolate and makes the most seemingly-difficult macaron easy. So, thanks Richard, a whole new world of baking is in my future.
The problems I had before were sticky, cracked cookies. This comes from too wet a batter and not enough folding. You want your batter to flow like lava and mine was no lava. You should also just go ahead and buy an instant digital thermometer that can read a temperature while touching the bottom of the pan, and a digital scale is a must. Converting recipes from grams to cups and teaspoons is not very accurate and you may end up with a whole sheet of failed cookies. It's not fun, it's sad and depressing and makes you feel like a failure (not good).
During our class, we watched Richard demonstrate the whole process, then under his supervision made our own batch. It was nice to have someone there to tell you when your batter looked like lava, and give your tips the best piping technique. It's also good to make a template on the back of some parchment paper. A 1 1/2 inch round makes a good size cookie and the template insures you'll be able to match your cookies for proper sandwiching. Another good trick to test for doneness is to press down on the center of the cookie and wiggle. If it wiggles a lot, cook it a little longer, if it wiggles very slightly it should be done. Also, you should peel them off the silpat by bending the mat, not attempting to lift the cookie. Fill cookies when cooled completely.
We made vanilla cookies with a little espresso powder sprinkled on top and filled with chocolate ganache and salted caramel. Yum! They were so good. I can't wait to try them again. I'll be buying pre-made almond flour from here on out. If you've tried macarons before without luck, don't give up, keep trying, it's all about the proper technique.

I also mentioned in my last post about macarons that I was headed to NYC and wanted to try some macarons from Bisous Ciao Macarons in the East Village. We happend to stay very near here, so a trip wasn't too far. They have mixed reviews on yelp, but Michael and I really enjoyed our flavors (blood orange with chocolate ganache and strawberry with basil chocolate ganache). The flavors were intense and the cookie itself was just what you expect from a quality macaron. My next traveling macaron stop will jave to be Pierre Herme in Paris. He's the godfather of Macarons (and french desserts) and why not travel to Paris for another tasting? Do you have a favorite french macaron shop in your city?
the following photos from Michael Townsend at Bisous Ciao, NYC



October 3, 2011
Apple Fritters

I've always enjoyed apple season. We used to go and pick apples at Stephenson's Orchard as a family when I was young. My sister and I would climb the trees to get some of the best apples from the tops. I have fond memories of blue rimmed heart shaped sunglasses during these adventures. Yeah 80's. I don't think you were supposed to climb the trees but we were little and probably light enough it didn't matter. We picked a ton of apples, mostly Jonathan apples, and stored them in a fridge in the garage. I miss the convenience of having an extra fridge or freezer. I don't know if the orchard still exists for picking in the Kansas City area, but the restaurant that had some of the best apple desserts does not. I was always fascinated by their caramel apples, and still am to this day. I'll be making my own soon so don't fret. I also have a special place in my heart for fried dough balls filled with apple chunks.

I picked a variety of recipes for the month of September for the Easy Bake cOven blog but I chose to make the fritters first. I usually get around to making quite a few of the recipes but these were calling me. Michael asked why I bought so many apples at Trader Joe's when we got back from our NYC trip, my response was baking. It's usually baking when I buy an excess of one particular ingredient. Unless butter is on sale...

I don't fry things often. Sometimes Michael and I will make tortilla chips if we're out and have nothing but corn tortillas, but this is the extent. Desserts are excessive to start and I feel worse eating something fried. Doughnuts fall in this category. I love doughnuts but don't have them often. Guilty pleasures. I really enjoyed these little fried dough balls. Simple and quick yet small enough you don't feel bad eating a few.

Apple Fritters
Pioneer Woman
I halved the recipe and it made about 2 dozen ping pong ball sized fritters.
2 C all purpose flour
1/2 C sugar
3 T sugar
2 1/4 tsp baking powder
1 1/4 tsp salt
2 tsp ground cinnamon
2 large eggs
3/4 C milk
2 tsp vanilla
2 T melted butter
2 whole granny smith apples peeled and diced
powdered sugar for dusting
In a medium bowl, combine flour, sugar, baking powder, cinnamon, and salt.
Melt the butter in a large liquid measuring cup and add the milk, egg and vanilla. Whisk to combine. Add the wet ingredients to the dry and stir until little flour remains. Add in the apples and stir to combine.
Heat a couple of inches of canola oil over medium heat. I kept my oil temperature around 325˚F and the fritters took about three minutes each. Using a small cookie scoop, drop a few blobs of dough into the hot oil, don't overcrowd or your oil will not stay consistently hot. Flip them over to insure even golden brown and test your first batch to make sure they are evenly cooked. Drain on a paper towel and sprinkle with powdered sugar for eating.
September 22, 2011
Almond Spiced Granola

You know how much I like granola right? I like chewy granola and crunchy granola, and I like trying new recipes. I recently adapted a recipe from Whole Foods and though I may have cooked it two minutes longer than I should (I blame allergies for lack of smell) I've enjoyed it. It's versatile because it is sweet and crunchy and no flavor is too overpowering.
If you are like me and feel ravenous before dinner, you can eat it by the handfull while rummaging through your kitchen for something to cook. You could also sprinkle it on muffins before baking, make a delicious yogurt parfait with seasonal fruits and agave nectar (or honey), use it as a topping for ice cream, make trail mix, or scoop it from a bowl filled to the brim with milk.

I like to eat yogurt wearing a toga, but you can wear whatever you like. Any way you eat it, I'm sure you will like it. Feel free to make it something you really love.
Almond Spiced Granola
adapted from Whole Foods
3 C old fashioned oats
3 T whole wheat flour
1 C slivered almonds
1 C pecan pieces
1/4 tsp kosher salt
2 tsp ground nutmeg
1/2 tsp pumpkin pie spice (or equal amounts of cinnamon, nutmeg and ginger)
1 tsp almond extract (or substitute vanilla)
1/2 C honey
1/3 C canola oil
Preheat the oven to 275˚F and line a large rimmed baking sheet with a silpat. Mix the dry ingredients and nuts in a large bowl. In a measuring cup add oil, honey and vanilla and stir. Add the honey mix into the oats and stir to coat evenly.
Bake for 30-40 minutes stirring occasionally to break up the larger pieces. Remove from oven when it's light brown and fragrant. Cool on the baking sheet for 1 hour or until completely cool (it will crisp up if it seems too wet after baking). Store in an airtight container.

September 15, 2011
a fight with french macarons
I've needed a good reason for years to try making macarons, French macarons. They are finicky, crisp-shelled, chewy-centered sandwich cookies, and usually better from a professional. I am no Pierre Herme, and there are bakeries everywhere dedicated solely to making these delicious bites. They are one of the most artistic cookies you can imagine with endless flavor combinations and they scare me.
I've been drooling over some of Tartelette's recipes for a long time and finally decided to use macarons as the recipe of the month for the Easy Bake cOven blog. I hoped two months to try macarons would be enough time, but even I didn't succeed in my own deadline. Summer scheduling is always difficult, and I'm guessing some people detest the idea of turning on their oven on a blistering summer day (even a mere 280˚F). For me, the oven is always welcome on our cold, depressingly foggy summer nights. I intended to make these on the last day possible (August 31) and post at the last minute, but I didn't. I came home that night to a messy kitchen and decided I should probably clean instead of make mess upon mess. We are nearing the end of September... and I have nothing to show!
I attempted the macarons on a Sunday hoping to donate them to a bake sale. They looked like they should, feet around the edge and a crisp shell. The problem I had was that they stuck really bad to the parchment. I tried scraping them off gently but most of them mushed into a half moon. I have no clue why this happened - every new recipe is an experiment right? I'm guessing it could be two things: too heavy of a batter or I left them too long to dry before baking. Because I don't know the answers, I quickly enrolled myself in a class from Baking Arts here is SF. Putting birthday money to good use. I took a class from Richard before and learned to make some of the most delicious chocolate truffles. I trust that this class will cure my horrible first experience and I promise to share everything with you mid October after my class.
I did rescue them somewhat... and turned my crumbs into "pistachio cacao nib balls" dipped in dark chocolate. Not my best by any means but it was good to avoid wasting a tasty cookie.
Now I will keep telling myself, "Failure is the only opportunity to begin again more intelligently" -Henry Ford.

I've been drooling over some of Tartelette's recipes for a long time and finally decided to use macarons as the recipe of the month for the Easy Bake cOven blog. I hoped two months to try macarons would be enough time, but even I didn't succeed in my own deadline. Summer scheduling is always difficult, and I'm guessing some people detest the idea of turning on their oven on a blistering summer day (even a mere 280˚F). For me, the oven is always welcome on our cold, depressingly foggy summer nights. I intended to make these on the last day possible (August 31) and post at the last minute, but I didn't. I came home that night to a messy kitchen and decided I should probably clean instead of make mess upon mess. We are nearing the end of September... and I have nothing to show!
I attempted the macarons on a Sunday hoping to donate them to a bake sale. They looked like they should, feet around the edge and a crisp shell. The problem I had was that they stuck really bad to the parchment. I tried scraping them off gently but most of them mushed into a half moon. I have no clue why this happened - every new recipe is an experiment right? I'm guessing it could be two things: too heavy of a batter or I left them too long to dry before baking. Because I don't know the answers, I quickly enrolled myself in a class from Baking Arts here is SF. Putting birthday money to good use. I took a class from Richard before and learned to make some of the most delicious chocolate truffles. I trust that this class will cure my horrible first experience and I promise to share everything with you mid October after my class.
I did rescue them somewhat... and turned my crumbs into "pistachio cacao nib balls" dipped in dark chocolate. Not my best by any means but it was good to avoid wasting a tasty cookie.
Now I will keep telling myself, "Failure is the only opportunity to begin again more intelligently" -Henry Ford.
image from bisous ciao macarons, pure art
Incredible inspiration!
I must visit here during my nyc trip in just over a week!
September 3, 2011
Lebovitz's Mint Ice Cream
I finally let Michael eat the last scoop of ice cream this week. Mid August, I warned him I needed one scoop to photograph for the blog and he reluctantly put the tub back in the freezer and went for vanilla instead. He reminded me a few times that I needed to take photos so he could eat it, and I reminded him that I needed good light for a good ice cream photo. I also needed to be home before 7 with nothing else to do on a weeknight to make this happen. August was a busy month.
I tried a new recipe from The Perfect Scoop by David Lebovitz. I think he is currently traveling around San Francisco and I'm resisting the urge to stalk him. I might have to visit Smitten Ice Cream soon though because he gave it a pretty good review on his blog... ice cream via liquid nitrogen. hmm.

I chose real mint ice cream. Why would I do such a thing you ask? Well, I have a garden now... you could say I'm developing a green thumb, and I'm growing mint. Mint is an easy plant even if you have a black thumb. Just beware as it is likely to take over areas of your garden unless confined to a pot. My mint is weird. It has smaller leaves and when it gets tall the leaves start to turn purple (this may mean my window box is too small). I used it anyways, even some of the purple, and it turned into a very refreshing ice cream. I added chocolate chips of course because mint needs the best flavor companion possible and I was a bit nervous about the strong fresh mint taste. If all else failed, at least the would be chocolate.
I liked it, I think Michael liked it too. He ate most of it anyways with bits of leftover cake that I didn't make into cake pops. My preference is still peppermint extract flavored ice cream, but this one was nice for a change, and nice to be able to use something I've grown in a recipe.

Mint Ice Cream
The Perfect Scoop, David Lebovitz
1 C whole milk
1/4 C sugar
2 C heavy cream
5 large egg yolks
2 C fresh packed mint leaves
1 C roughly chopped chocolate (mini chocolate chips work well too) my addition
Heat milk, sugar, and 1 C cream in a heavy bottom saucepan. Add the mint leaves and steep for one hour. This means stir them up and cover with a lid. Go do some sit-ups since you'll be eating this later, and and strain the mixture through a fine mesh strainer. Make sure you push leaves against the strainer to extract as much liquid as possible. Lebovits says your cream will be a lovely shade of emerald, but mine was barely green. Warm this mix back up on meduim heat.
In another bowl, whisk the egg yolks. Once the milk is warm, slowly add the milk, whisking constantly, to the eggs and then return all of this to the pot and continue to heat until the mixture is thick enough to coat the back of a spoon. Stir constantly and try not to let anything burn to the bottom.
In another bowl (more dishes please!) add the remainder of the cream and set the mesh strainer on top (remove leaves). Pour the minty custard through the strainer again to eliminate scrambled eggs in your ice cream and stir into the cream. Place over an ice bath to help cool. Cover and refrigerate overnight or at least four hours. You can add green food coloring now.
Prepare the ice cream according to your machine manufacturer's recommendations. Be sure you've frozen your bowl for as long as required or your ice cream will never get thick. Freeze again for a few hours until it's scoopable, about 4 hours.
Ice cream takes a while, so it's best to plan ahead if your're making it for an event!
Happy Churning!

I tried a new recipe from The Perfect Scoop by David Lebovitz. I think he is currently traveling around San Francisco and I'm resisting the urge to stalk him. I might have to visit Smitten Ice Cream soon though because he gave it a pretty good review on his blog... ice cream via liquid nitrogen. hmm.

I chose real mint ice cream. Why would I do such a thing you ask? Well, I have a garden now... you could say I'm developing a green thumb, and I'm growing mint. Mint is an easy plant even if you have a black thumb. Just beware as it is likely to take over areas of your garden unless confined to a pot. My mint is weird. It has smaller leaves and when it gets tall the leaves start to turn purple (this may mean my window box is too small). I used it anyways, even some of the purple, and it turned into a very refreshing ice cream. I added chocolate chips of course because mint needs the best flavor companion possible and I was a bit nervous about the strong fresh mint taste. If all else failed, at least the would be chocolate.
I liked it, I think Michael liked it too. He ate most of it anyways with bits of leftover cake that I didn't make into cake pops. My preference is still peppermint extract flavored ice cream, but this one was nice for a change, and nice to be able to use something I've grown in a recipe.

Mint Ice Cream
The Perfect Scoop, David Lebovitz
1 C whole milk
1/4 C sugar
2 C heavy cream
5 large egg yolks
2 C fresh packed mint leaves
1 C roughly chopped chocolate (mini chocolate chips work well too) my addition
Heat milk, sugar, and 1 C cream in a heavy bottom saucepan. Add the mint leaves and steep for one hour. This means stir them up and cover with a lid. Go do some sit-ups since you'll be eating this later, and and strain the mixture through a fine mesh strainer. Make sure you push leaves against the strainer to extract as much liquid as possible. Lebovits says your cream will be a lovely shade of emerald, but mine was barely green. Warm this mix back up on meduim heat.
In another bowl, whisk the egg yolks. Once the milk is warm, slowly add the milk, whisking constantly, to the eggs and then return all of this to the pot and continue to heat until the mixture is thick enough to coat the back of a spoon. Stir constantly and try not to let anything burn to the bottom.
In another bowl (more dishes please!) add the remainder of the cream and set the mesh strainer on top (remove leaves). Pour the minty custard through the strainer again to eliminate scrambled eggs in your ice cream and stir into the cream. Place over an ice bath to help cool. Cover and refrigerate overnight or at least four hours. You can add green food coloring now.
Prepare the ice cream according to your machine manufacturer's recommendations. Be sure you've frozen your bowl for as long as required or your ice cream will never get thick. Freeze again for a few hours until it's scoopable, about 4 hours.
Ice cream takes a while, so it's best to plan ahead if your're making it for an event!
Happy Churning!

July 16, 2011
to Cake Pop or to Pake Cop
I made another wedding cake this weekend. It was great fun, except that in addition to the wedding cake, I made a cake for my co-worker's son's birthday. I don't think I'll overbook myself again and I'm asking all of you to hold me accountable. I can't imagine another week of working 10+ hour days, then standing in the kitchen for another few hours each night in preparation. The birthday cake was fun and gigantic, and I'll be sure to share some photos and recipes later. The wedding cake was much less stressful than my first, and it turned out well. I guess you learn a little bit each time, right?

I'm working on a post for the wedding cake, but was hoping you all might have some great ideas for all of my leftover scraps. You know, the rounded portions of the cakes you have to sacrifice to make each layer perfectly level. As much as I love cake pops, I wanted to make something a little less sweet (pake cops). Maybe incorporate chocolate ganache into the batter instead of frosting? I want something a little more grown-up. I'm guessing Michael would prefer to keep sprinkling the scraps on top of ice cream...
Ok people, I'm all ears and a bit brain-dead. Looking forward to two more cakes and a pie this week. hehe. (now in your best mad scientist voice) I. Will. Never. Stop. Baking!

Ok people, I'm all ears and a bit brain-dead. Looking forward to two more cakes and a pie this week. hehe. (now in your best mad scientist voice) I. Will. Never. Stop. Baking!
July 12, 2011
Beet Chips
When I was little, the only beets I knew were in a jar the fridge submerged in dark purpleish-red juice and they were gross. I don't like pickled beets (Michael does). I don't like many things pickled but beets are at the top of my list. It wasn't until I moved to SF that I experienced beets in a positive way. A lot of restaurants jumped on the "beet and goat cheese" bandwagon, and I finally realized I loved roasted beets. Naturally sweet and earthy, how can you resist?
It's hard to cook beets any other way, or make them different because beets always taste the same. I don't eat beets with goat cheese much anymore. The best beet salad I had recently was literally a pile of thinly sliced red and gold beets with a handful of greens, bleu cheese and candied walnuts from Chez Spencer. Yum. I often get tired of roasted beets. When this happens, I go in search of a new recipe. I've heard of beet cake, and beetloaf, but the most appealing were beet chips!

We had a little package of beet chips from Whole Foods in my office recently. One of my bosses set them out. My office likes to munch. If they had been normal potato chips, they may have made it past lunch, but the beet chips last a few days. They were thick cut and fried. Shame on you Whole Foods! You don't have to fry all things to make them taste good. Instead, I sliced up a few beets with the mandoline, sprinkled them lightly with kosher salt and baked them until they were light and crispy. They are delicious and pretty. They also don't taste as vegetal as the WF fried version. They are a great snack, and most likely an easy way to get kids to eat something different. Who would not try a purple chip?

The only unfortunate thing about beet chips is they shrink so much when you bake them. Almost by half. So, in order to feed a lot of people for an interesting party snack, you would have to peel and slice a lot of beets. Not bad if you have a little time and like pink hands.

Beet Chips
10 medium size beets peeled and sliced thin on a mandoline (or as thin as your knife can slice them)
2 T olive oil (optional)
kosher salt
Slice the beets and line a couple of baking sheets with parchment or a silicone mat. Place the beets in a single layer and sprinkle lightly with salt. (also you can toss the chips in olive oil before placing on the sheet) Bake at 350˚ for 15-20 minutes. Most of the moisture should be gone. Let air dry until completely crisp. Enjoy!
It's hard to cook beets any other way, or make them different because beets always taste the same. I don't eat beets with goat cheese much anymore. The best beet salad I had recently was literally a pile of thinly sliced red and gold beets with a handful of greens, bleu cheese and candied walnuts from Chez Spencer. Yum. I often get tired of roasted beets. When this happens, I go in search of a new recipe. I've heard of beet cake, and beetloaf, but the most appealing were beet chips!

We had a little package of beet chips from Whole Foods in my office recently. One of my bosses set them out. My office likes to munch. If they had been normal potato chips, they may have made it past lunch, but the beet chips last a few days. They were thick cut and fried. Shame on you Whole Foods! You don't have to fry all things to make them taste good. Instead, I sliced up a few beets with the mandoline, sprinkled them lightly with kosher salt and baked them until they were light and crispy. They are delicious and pretty. They also don't taste as vegetal as the WF fried version. They are a great snack, and most likely an easy way to get kids to eat something different. Who would not try a purple chip?

The only unfortunate thing about beet chips is they shrink so much when you bake them. Almost by half. So, in order to feed a lot of people for an interesting party snack, you would have to peel and slice a lot of beets. Not bad if you have a little time and like pink hands.

Beet Chips
10 medium size beets peeled and sliced thin on a mandoline (or as thin as your knife can slice them)
2 T olive oil (optional)
kosher salt
Slice the beets and line a couple of baking sheets with parchment or a silicone mat. Place the beets in a single layer and sprinkle lightly with salt. (also you can toss the chips in olive oil before placing on the sheet) Bake at 350˚ for 15-20 minutes. Most of the moisture should be gone. Let air dry until completely crisp. Enjoy!
July 8, 2011
Apricot Blueberry Cobbler
The other night I blew up a pyrex in my kitchen. I realize now I shouldn't put my trust in a brand name that has been around forever, claiming you can transfer your bakeware from freezer to oven and such. I could trust something made in the 1920's but not recently. They changed the glass product from borosilicate glass to soda-lime glass which can't handle the swing in temperatures and results in a shatter. I lost some good pastry cream and spent way too much time cleaning little glass shards out of my kitchen. Note to bakers: don't use pyrex on the stovetop (and definitely use caution in the oven with change in temperature). This little disaster put a bit of a hold on my baking for a while. I remade my pastry cream and finished a birthday tart for my office, but since then, I haven't been baking much. sigh.
Kitchen disaster behind, I decided to use some new ramekins to make individual apricot blueberry cobblers. Sugar Dough was the monthly recipe for June over at the Easy Bake cOven and since I had some very ripe fruits in my fridge, I put together this incredibly simple dessert.
I think most people are more familiar with cobbler that has a fruit filling and a sugar dough topping. Sugar dough may range from a biscuity dough to a thick crumble, and even hunks of bread. The sugar dough recipe we used came from the restaurant stove in Portsmouth, Virginia. I was reading a blog post the other day and someone said they were skeptical of restaurants who published their recipes. Would they leave something out? Why would they reveal their secrets to ordinary people? Well, I can't tell you the answers to these questions, but I'm glad that some restaurants are confident enough to do it. I have a feeling knowing Stove's recipe will not keep Sarah & Eric from going back! Thanks for picking this recipe, it was fantastic!

Mini Fruit Cobbler
you can use any stone fruit or fruits that won't obliterate when cooked
for one 10 oz ramekin:
slice 3 small fruits into a buttered ramekin
add 2 tablespoons blueberries
break up 1 scant tablespoon of butter and distribute evenly
sprinkle 1 tablespoon of sugar over the top
top with sugar dough and press lightly into the fruit (about 1/2 to 3/4 cup)
set ramekins on a baking sheet
bake for 20-25 minutes at 350˚F or until the fruit is bubbly
Kitchen disaster behind, I decided to use some new ramekins to make individual apricot blueberry cobblers. Sugar Dough was the monthly recipe for June over at the Easy Bake cOven and since I had some very ripe fruits in my fridge, I put together this incredibly simple dessert.
I think most people are more familiar with cobbler that has a fruit filling and a sugar dough topping. Sugar dough may range from a biscuity dough to a thick crumble, and even hunks of bread. The sugar dough recipe we used came from the restaurant stove in Portsmouth, Virginia. I was reading a blog post the other day and someone said they were skeptical of restaurants who published their recipes. Would they leave something out? Why would they reveal their secrets to ordinary people? Well, I can't tell you the answers to these questions, but I'm glad that some restaurants are confident enough to do it. I have a feeling knowing Stove's recipe will not keep Sarah & Eric from going back! Thanks for picking this recipe, it was fantastic!

you can use any stone fruit or fruits that won't obliterate when cooked
for one 10 oz ramekin:
slice 3 small fruits into a buttered ramekin
add 2 tablespoons blueberries
break up 1 scant tablespoon of butter and distribute evenly
sprinkle 1 tablespoon of sugar over the top
top with sugar dough and press lightly into the fruit (about 1/2 to 3/4 cup)
set ramekins on a baking sheet
bake for 20-25 minutes at 350˚F or until the fruit is bubbly
Stove’s Sugar Dough
This is not a dough for rolling, you have to pat this dough out into the pan your using for dessert. It’s rich and wonderful and can also be made into a short bread as well. I have even used it for bottoms of pans mixed with pecans and then a cake batter over that for a crunch factor. Just don’t over mix it or you will have some good rubber dough
1 cup white sugar, baker’s sugar if you can find it
1lb unsalted double A butter
6 cups of all purpose flour, (unbleached and without chemicals if possible, King Arthur is good stuff and easy to find)
In the bowl of a 4 to 6qt. mixer cream the sugar and butter until light and somewhat fluffy. Stop the machine, scrape down sides and add all at once 6 cups of flour, raise the bowl and on the lowest speed blend the dough until it pulls together. If it’s winter and your environment isn’t warm you may need to spray from a mister water a little at a time till the dough starts to combine. Pinch a bit of dough to see if it will hold together, if so it’s ready for use.
this dough stores in the refrigerator for a week or so. It also makes a ton, so feel free to half the recipe.
Subscribe to:
Posts (Atom)
you might also like...
